This is an example of how to set up the ps1 printer.
Download Kyocera-Mita driver from the Kyocera website. From the "Download Center" choose the right driver - FS-4000DN - and the right operating system and download them to your computer.
Double-click on the file to execute it. Follow the installation wizard, accept the default setting.
Note:
The screenshots below have been taken from a Windows 10 installation, but they should work for Windows 11 as well.
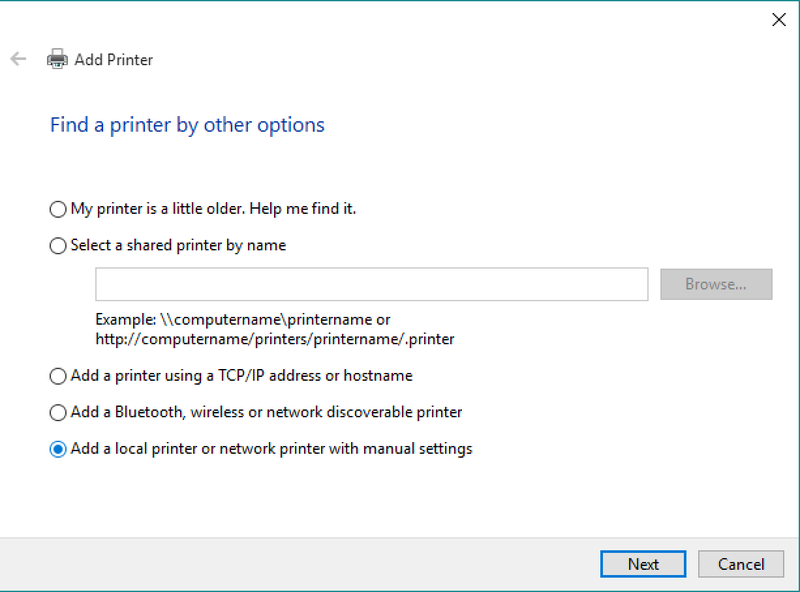
Go to Printers in your OS and choose "add new printer" and click on the link "The printer I want is not listed here".
In the next window choose "Add a local printer or network printer with manual settings" and click "next"
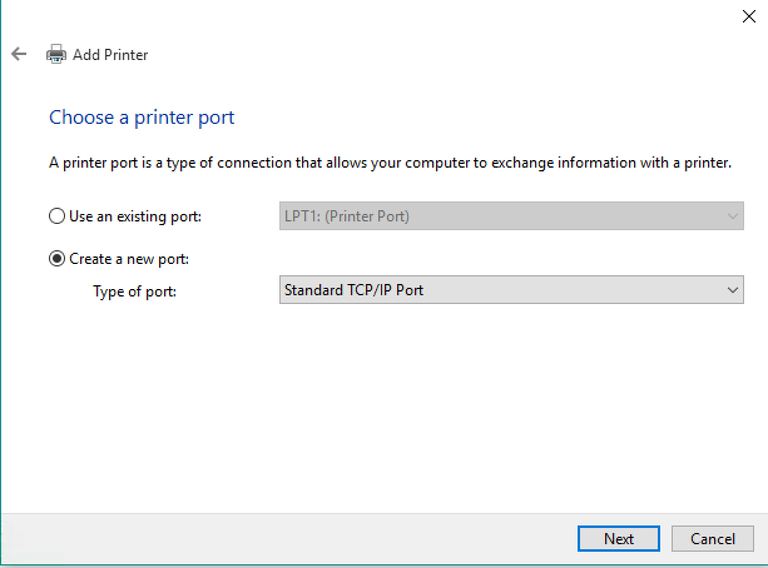
Choose "Create new port", "Standard TCP/IP Port" and click "next".
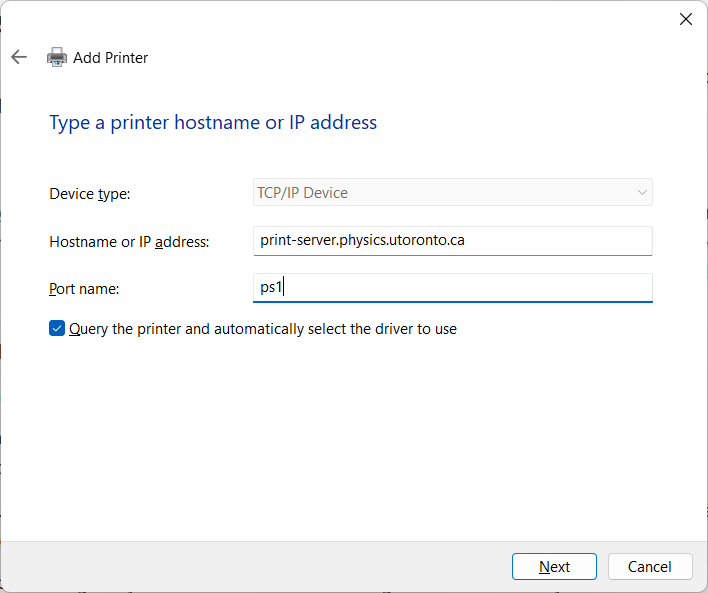
Choose the following:
Hostname or IP address: print-server.physics.utoronto.ca
Port Name: ps1
Click "next".
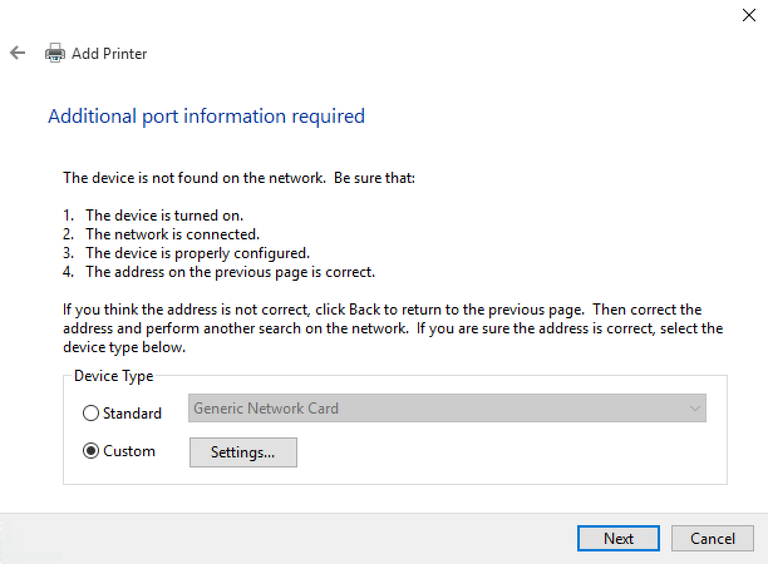
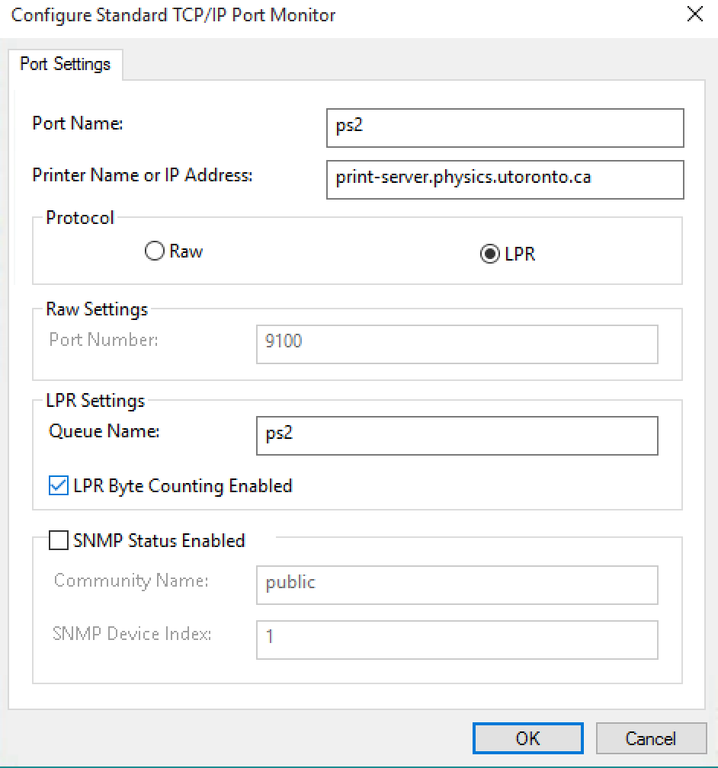
Choose "Custom" and click "Settings". A new window will open.
Choose the following:
Port Name: ps1
Printer Name or Ip Address: print-server.physics.utoronto.ca
Protocol: lpr
Lpr settings:
Queue Name: ps1
LPR Byte Counting Enabled: yes
Click OK.
Current window will close. Click "Next" in screen previously opened.
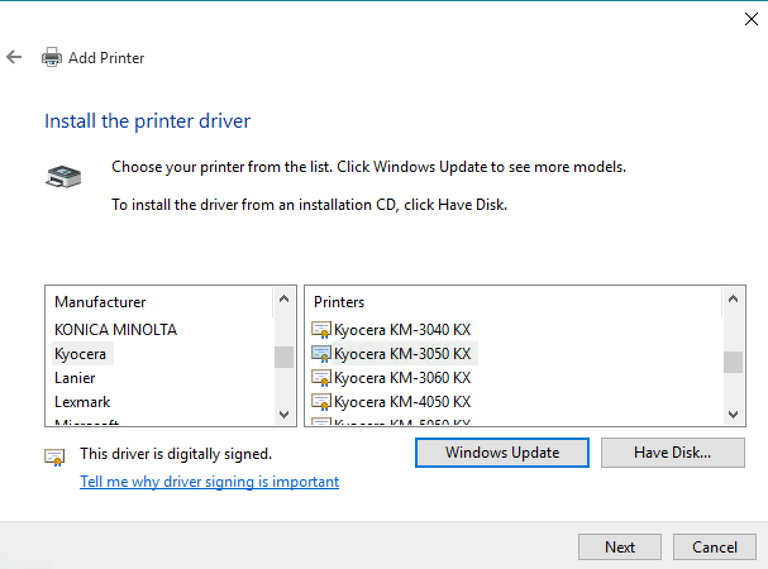
Choose the appropriate printer driver for your queue:
Under Manufacturers select "Kyocera".
Under Printers select
   Kyocera FS-4000DN (KPDL-3) for ps1
Click "next".
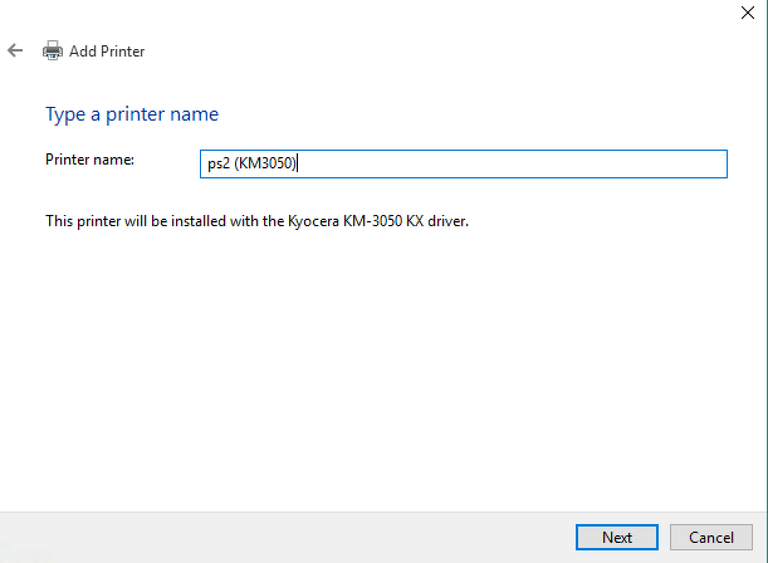
Add a printer name.
Click next.
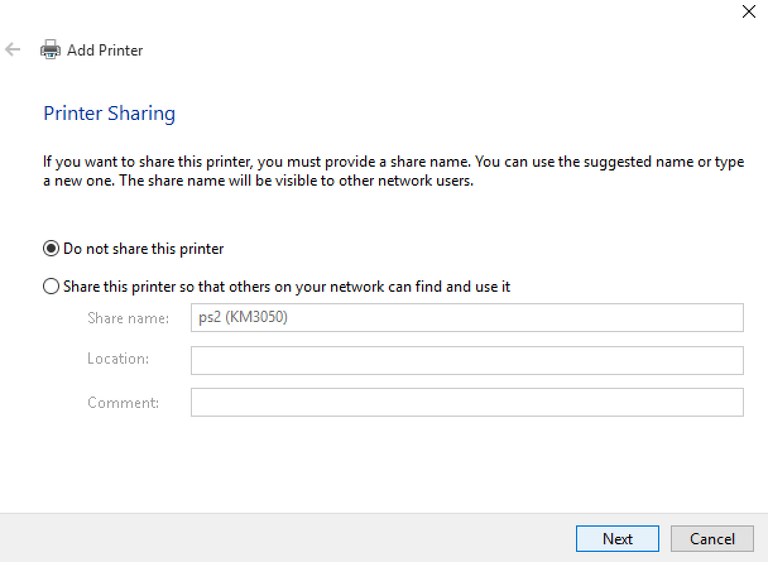
Printer Sharing
Choose "Do not share this printer"
Click "Next"
In the last window, you have the option to set this as a default printer.
Click "Finish".
Done