NOTE:
- The installation procedure is explained for lp6. To install lpclr2 just change "lp6" with "lpclr2" in the text below. Where there are differences, they will be noted.
- This installation procedure can be also followed by people using Ubuntu 8 or Fedora 8, 9.
To set up lp6 on your Linux desktop, take the following steps:
Step 1 - download ppd file
Download the PPD file for the LP6/LPCLR2 Color/Black printers: Ricoh Aficio SP C430DN Postscript
Alternately you can download the PDF PPD file (not tested by us but preferred by the Open Printing site): Ricoh Aficio SP C430DN PDF
Save it on the desktop or in any other folder you can remember later.
Step 2 - setup printer
Go to System > Administration > Printing
Type in the administrator password (if you don't have it, ask your supervisor or PCS (pcs@physics.utoronto.ca) for help.
In the printer configuration tool click to add a "New Printer" and fill out the following:
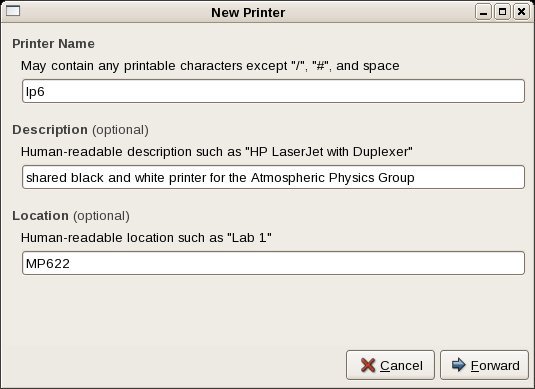
Printer name: lp6
Description: some text helping you identify the printer
Location: MP622
Click "Forward"
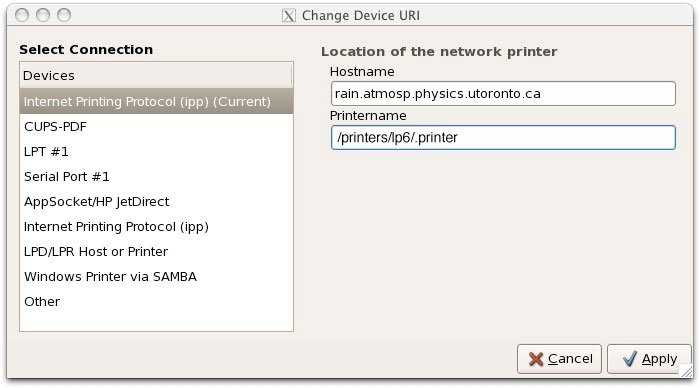
Select Connection: Internet Printing Protocol (ipp)
Hostname: rain.atmosp.physics.utoronto.ca
Print que: /printers/lp6/.printer
Printername: lp6
Click "Forward"

Choose "Provide PPD file"
Browse to the desktop or wherever you have saved your ppd file from step 1 and choose the downloaded file which should be something like: Ricoh-Aficio_SP_C430DN.ppd (for both LP6 and LPCLR2)
Click "Forward"
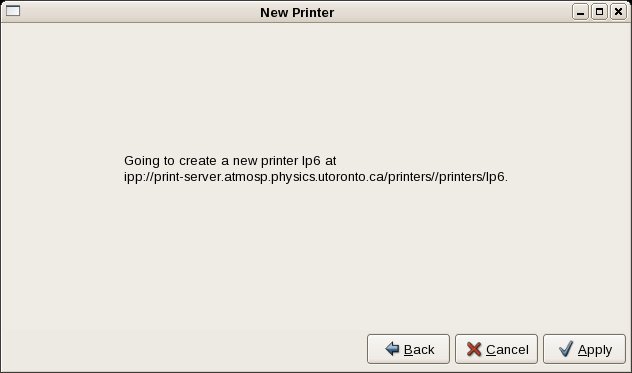
Click "Apply"
Step 3 - configure printer
In the printer configuration tool click on the newly created printer "lp6".
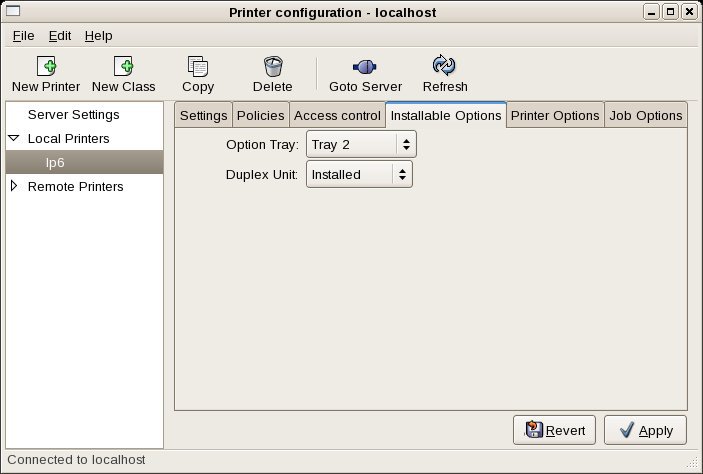
Go to the tab "Installable Options" and set the following:
Option Tray: Tray 2
Duplex Unit: Installed.
Click "Apply".
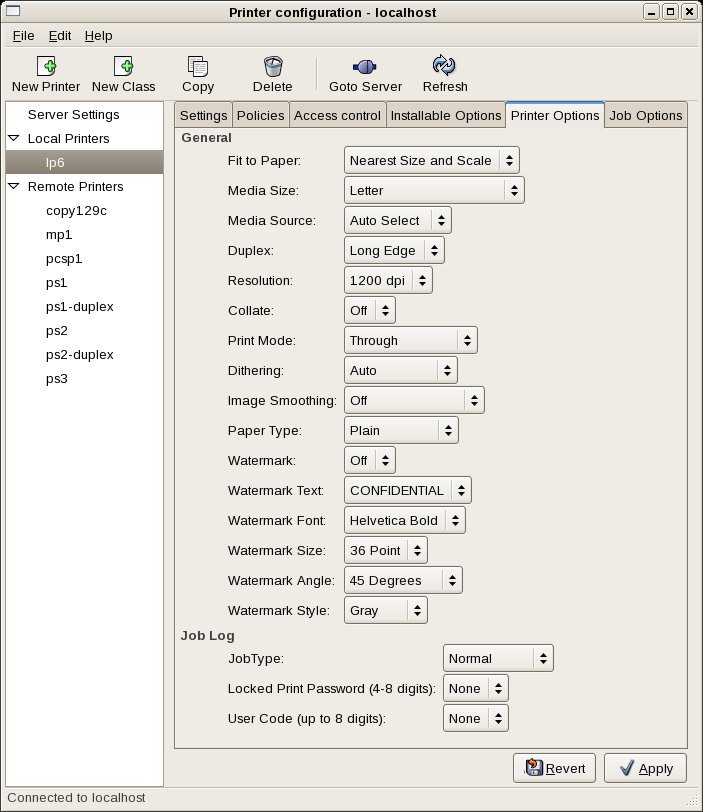
Go to the tab "Printer Options" and set the following options:
Fit To Paper: Nearest Size and Scale
Media Size: Letter
Duplex: Long Edge
Resolution: 1200 dpi
The rest of the settings should be kept the same.
Click "Apply".
The printer is now set and you can close the "Printer Configuration" window.